

Snapseed is an app that you should definitely be using not only if you're really serious about photography, but also if you want to ensure that your online work sets the standard for social media. It's a great companion app to Instagram and VSCO, and it will save your day many times over when you find yourself on your phone, on-the-go, needing to edit an image beyond the typical everyday filters.
So, let's say you're a frequent selfie-taker in VSCO (which is where you should be taking your selfies), but wait ... you have a blemish! VSCO isn't really going help you there, so that's where Snapseed comes in. The app has a built-in Healing tool to "heal" your blemishes, unwanted spots, wrinkles, food stains, and the link. It can even remove photo bombers from your pics.
Snapseed. It's just like magic. It's also free. If you don't have it yet, then you can download Snapseed for iPhone (iOS App Store) or Android (Google Play Store).
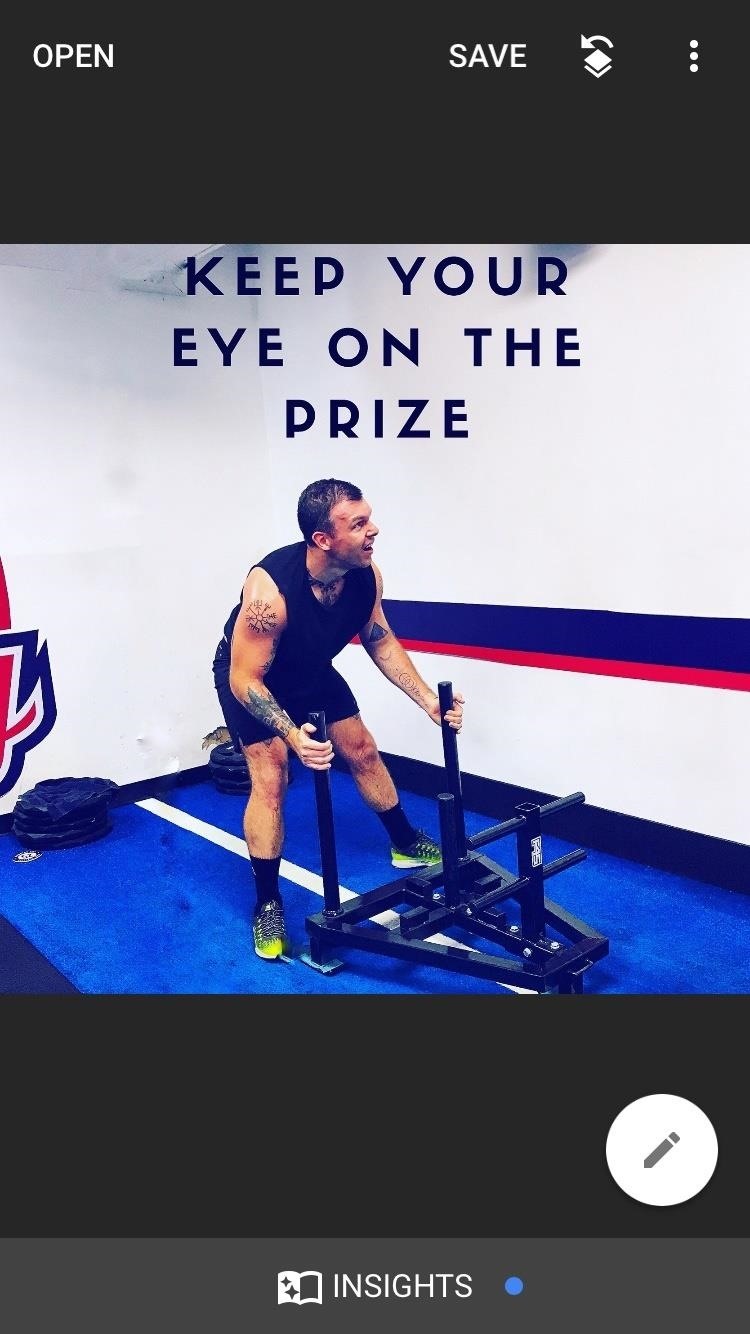
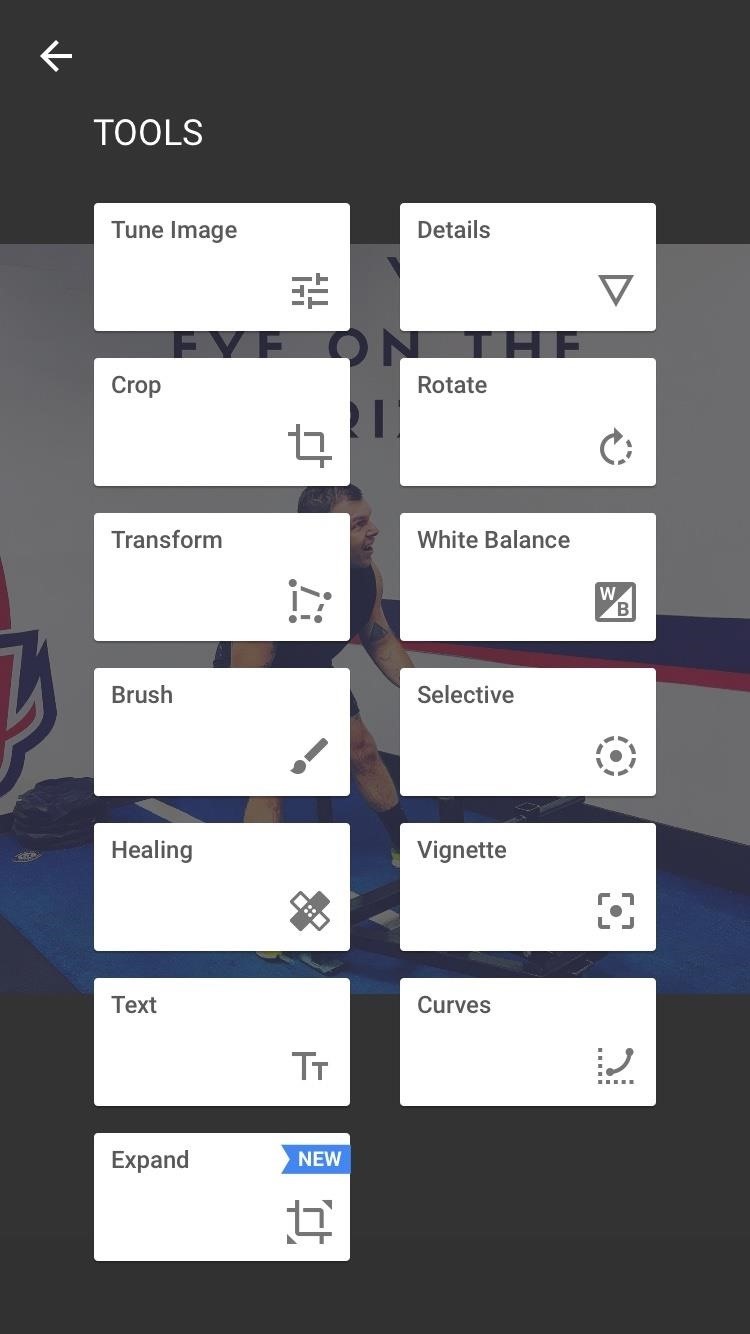
Step 1: Access Snapseed's 'Healing' Tool
Make sure you have the photo that you want to pick open and ready. If you need help importing an image into Snapseed, we've got a guide for that, too.
Once you've picked out your content, tap on the editing icon at the bottom-right corner of your screen. From here, tap on "Healing" in the list of Tools.
Step 2: Use Snapseed's Healing Tool
The healing tool works by covering the unwanted element with the surrounding scene. That's why, sometimes, you may find an element hard to remove if your image contains lots of colors or objects. The healing tool works best on standalone objects and uncluttered spaces.
For this post, I'll show you how to remove an unwanted structure and person from an image. I'll also show you what happens when you try and remove an element that is obstructed by too many colors or objects.
Tap or draw with your finger over the area that you'd like to remove. This is the tool that selectively removes parts of your image. After using the tool, if it fails to remove the element with perfection, you can zoom into your image by pinching out or double-tapping the screen to try and achieve better results. You can zoom out by pinching in on the screen or double-tapping again.
I'd recommend always zooming into your image to use the healing tool as it tends to give the cleanest results.


Also, once zoomed in, use two fingers to navigate the image. If you use just one finger, you may accidentally remove a part of your image that you did not want to remove. If this happens and you'd like to undo the change, tap on the back arrow at the bottom of your screen. If you'd like to redo the change, then tap on the forward arrow. When you're finished, tap on the check mark at the bottom-right corner of your screen.


Step 3: Save It as New Image
If you're using an iPhone, then tap on "Save" at the top to save it to your device. If you're using an Android, then tap on the save/download icon at the top. From here, choose the option that suits your purposes. You can create a copy of the image on your device, export it to a specific location, or share with another app.
Just updated your iPhone? You'll find new emoji, enhanced security, podcast transcripts, Apple Cash virtual numbers, and other useful features. There are even new additions hidden within Safari. Find out what's new and changed on your iPhone with the iOS 17.4 update.


Be the First to Comment
Share Your Thoughts